Helping Companies Navigate DevOps Solutions | Linux Administration | CI/CD Pipelines | Multi-Cloud Management

Why we need db backup:
The advantage of regularly backing up data is the ability to restore data operations in the case of a ruinous failure of the system. Another benefit is data versioning, which means that specific versions of your data are stored when changes occur so that you can go back in time to restore older versions in order to get the state of your ground truths at that point in time.
Also The practice of backing up data also means that in the event of a migration to a new server or development environment, data can be transferred without any fear of loss
MySQL offers a variety of backup strategies from which you can choose to select whatever methods best suit the requirements for your installation.
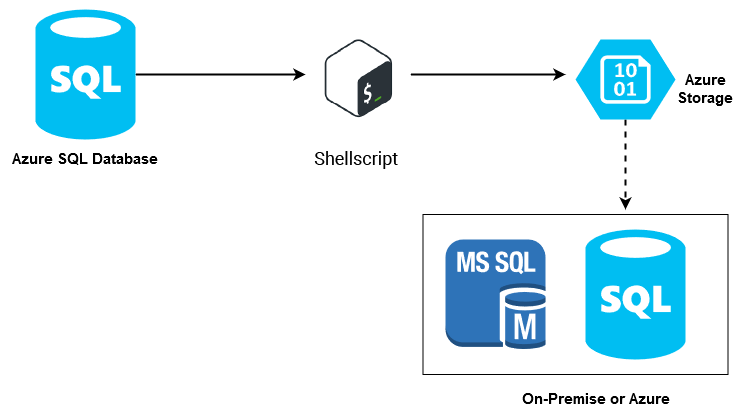
Here we schedule the individual database backup using mysqldump command for Azure MySQL and move the backups to the Azure Blob container.
Azure CLI setup on Ubuntu
One of the most common ways to install the Azure CLI on Ubuntu is to leverage the apt-get package manager.
To set up the Azure CLI with the apt-get package manager:
Open up the Ubuntu Terminal
Update the apt-get repository cache to ensure it knows the latest version of all packages.
Next, install the following dependent packages with apt-get:
#sudo apt-get install ca-certificates curl apt-transport-https lsb-release gnupgUse the command-line utility curl to download and configure the Microsoft signing key. When you download the Azure CLI package, this key will verify it actually came from Microsoft.
downloads the signing key from Microsoft
 curl -sL https://packages.microsoft.com/keys/microsoft.asc |
     gpg --dearmor | ## unpacks the key
sudo tee /etc/apt/trusted.gpg.d/microsoft.gpg > /dev/null ## creates a file called microsoft.gpg in the folder where keys are stored
Just about there! Next, add the Azure CLI repository.
AZ_REPO=$(lsb_release -cs) ## outputs the codename for the linux distribution i.e. Ubuntu 	18.04 = bionic
 echo "deb [arch=amd64] https://packages.microsoft.com/repos/azure-cli/ $AZ_REPO main" 	| ## outputs the entire url with the codename appended.
     sudo tee /etc/apt/sources.list.d/azure-cli.list
## writes that URL to the package resource list,
At last, now download and install the Azure CLI package.
#sudo apt-get update sudo apt-get install azure-cliCreate the Azure Blob container and Access key.
You can create the storage account using Azure Console or using Azure CLI.
Prerequisites
To access Azure Storage, you’ll need an Azure subscription.
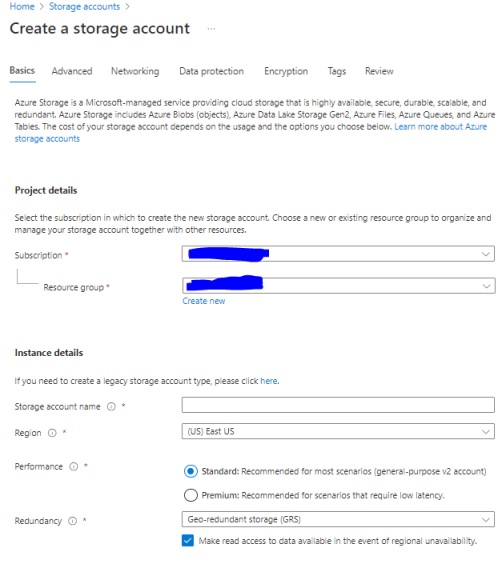
Steps to create the storage account using Azure Console.
- Create a container.
- To create a container in the Azure portal, follow these steps:
- Navigate to your new storage account in the Azure portal.
- In the left menu for the storage account, scroll to the Data storage section, then select Containers.
- Select the + Container button.
- Type a name for your new container. The container name must be lowercase, must start with a letter or number, and can include only letters, numbers, and the dash (-) character. For more information about container and blob names, see Naming and referencing containers, blobs, and metadata.
- Set the level of public access to the container. The default level is Private (no anonymous access).
- Select Create to create the container.

Steps to create the storage account using Azure CLI
To begin, sign-in to to your Azure account with the az login.
#az loginIf you have multiple subscriptions, you have to set one of them for the current session.
#az account set –subscription “NameOfYourSubscription”Create a resourcegroup
#az group create \ --name <resource-group> \ --location <location>To create a storage account in a resource group, execute
#az storage account create \ --name <storage-account> \ --resource-group <resource-group> \ --location <location> \ --sku Standard_ZRS \ --encryption-services blobCreate a storage account using accesskey
#az storage container create \
    --account-name <storage-account> \
    --name sample-container \
    --account-key <key>
--auth-mode keyCreate the shell script for taking backup
Modify the below shell script as per your setup and save the file on any path with executable permission.
Script:
#!/bin/bash
DATE=`date +%Y%m%d`
USER="UR MYSQLUSER"
MYSQL_PASSWORD="UR MYSQL PASSWORD"
OUTPUT="/opt/dump/mysqldump"
MyHOST="NAME-database.mysql.database.azure.com"
year=$(date +"%Y")
mon=$(date +"%m")
day=$(date +"%d")
Zip_password='PWD'


databases=`mysql -h $MyHOST -u $USER -p$MYSQL_PASSWORD -e "SHOW DATABASES;" | tr -d "| " | grep -v Database`

for db in $databases; do
    if [ "$db" != "performance_schema" ] && [ "$db" != "mysql" ] && [ "$db" != "any_test" ] && [ "$db" != _* ] ; then
        echo "Dumping database: $db"
         mysqldump -h $MyHOST --column-statistics=0  -u $USER -p$PASSWORD --databases $db > $OUTPUT/$DATE.$db.sql
         sleep 5s
         Zip -P $password  $OUTPUT/$DATE.$db.sql
        sleep 2s
        az storage blob upload --account-name NAMEOFTHEACCOUNT --account-key "YOURSECRETKEY" --container dbbackup --file  $OUTPUT/$DATE.$db.sql.gz --name $year/$mon/$day/$DATE.$db.sql.gz
        sleep 2s
        rm -rf $OUTPUT/$DATE.$db.sql.gz
    fi
done
Note: Zip -P $password $OUTPUT/$DATE.$db.sql –> this command will be compress the every sql file with passwd.
Setting the cronjob in Ubuntu Server for scheduling the backup.
If cron is not installed, install the cron package on Ubuntu:
One can Install the cron package with package Manager using the following command-
#apt-get install cron

#sudo crontab -e    //install your cron job by running this command.

55 23 * * 1,4 sh /opt/scripts/all_db_dump.sh 2>&1 | tee /tmp/cron.log
## we take the backup weekly twice on 23.55 on Monday and Wednesday.
Note: configure the firewall settings of Ubuntu VM for accessing the Azure MySQL in the Azure Console
Azure Mysql has the option for automatically creates server backups and stores them in user configured locally redundant or geo-redundant storage. Backups can be used to restore your server to a point-in-time. Though our script helps to take the individual db backup, for example if we have different customers databases in single endpoint or large number of databases, we can download the required db backup file and restore.
