
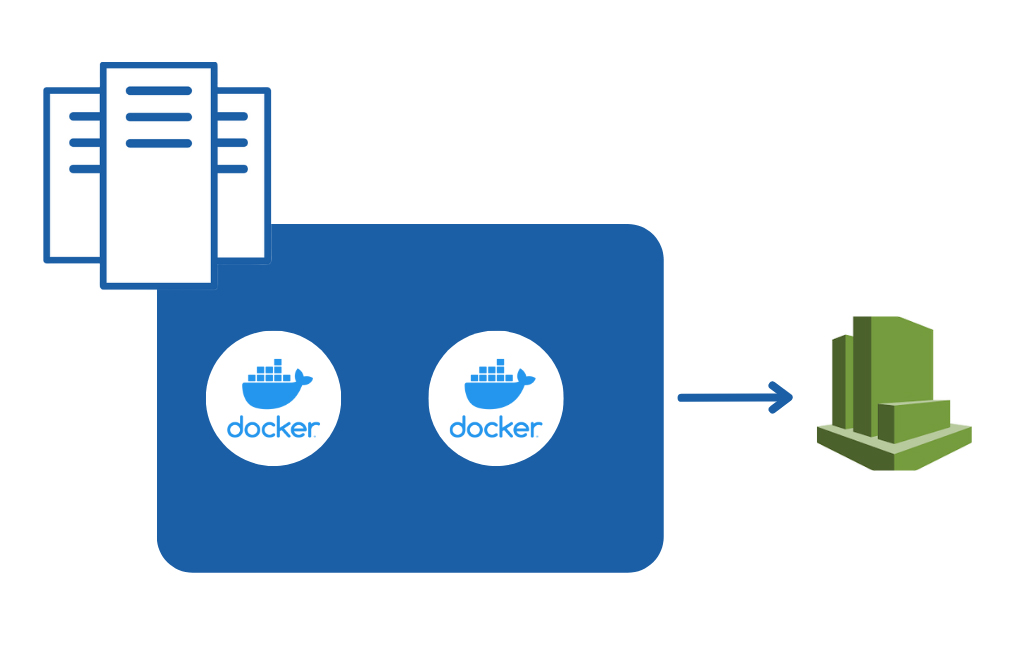
As businesses adopt a hybrid architecture with both on-premises and cloud environments, having a centralized log dashboard has become essential for monitoring and analyzing application logs. One such dashboard is AWS CloudWatch, which provides a single source of truth for all data generated by applications and services across multiple environments. By uploading Docker container logs to CloudWatch, teams can easily monitor events, track errors, and detect anomalies, among other benefits.
Docker container logs are a powerful tool for debugging applications and production issues, providing developers with a wealth of information that can help identify the root cause of any problem. By analyzing these logs, developers can quickly identify and fix errors, as well as monitor application performance in real-time. By utilizing Docker container logs, developers can ensure that their applications are running smoothly.
The CloudWatch Management Console provides an intuitive interface for monitoring and managing log files. With its robust search functionality, you can easily view and search for specific error codes or patterns within the log file, allowing you to take corrective measures quickly. Additionally, the CloudWatch Management Console allows you to set up alerts to stay on top of any potential issues before they become serious problems.
Introduction: What are Docker Container Logs and Why Should You Upload Them to AWS Cloudwatch?
Docker container logs are a powerful tool for debugging applications and production issues. They provide a wealth of information that can be used to identify the root cause of any problem. By analyzing these logs, developers can quickly identify and fix errors and other issues that could otherwise take days or even weeks to resolve. Furthermore, they can also use the logs to monitor their applications’ performance in real-time, allowing them to make changes as needed. With docker container logs, developers have an invaluable resource at their fingertips that can help them ensure their applications are running smoothly.
The CloudWatch Management Console is a powerful tool for monitoring and managing your log files. It provides you with the means to easily view all your logs, search for specific error codes or patterns within the log file, and take action on them quickly. With its intuitive interface, you can quickly identify areas of concern in your system and take corrective measures to ensure that everything runs smoothly. Additionally, the CloudWatch Management Console allows you to set up alerts so that you are notified when any errors occur. This ensures that you can stay on top of any potential issues before they become serious problems.
In this step-by-step guide, we will show you how to upload on-prem Docker container logs to AWS CloudWatch using Dockerfile. This guide will cover the necessary steps and configurations required to set up the log stream and push logs to CloudWatch. By following this guide, you can set up centralized logging for your on-premises Docker container logs in AWS CloudWatch quickly and easily.
A Step-By-Step Guide to Upload On-Prem Docker Container Logs to AWS Cloudwatch Using Dockerfile
Step 1: Setting Up the Prerequisites for Uploading Docker Container Logs to the Cloud
The below are prerequisites configs/files
- Docker file – to build the docker image and run container
- Config.json – Log group, Log stream and Log file path configuration
- IAM Access – Permissions for AWS cloudwatch access
- common-config.toml – we will use an on premise Docker container to mention profile and credential path of IAM.
- myapp.script.sh – to run both service
Step 2: Creating a Customised Dockerfile for Logging Configuration
- Dockerfile
For example, we create a docker file for deploying the springboot application
FROM openjdk:11
WORKDIR /opt/
COPY application.jar  /opt/
EXPOSE 8235
RUN apt-get update &&  \
 apt-get install curl -y && \
 curl -O https://s3.amazonaws.com/amazoncloudwatch-agent/debian/amd64/latest/amazon-cloudwatch-agent.deb && \
  dpkg -i amazon-cloudwatch-agent.deb
COPY config.json/  /opt/aws/amazon-cloudwatch-agent/bin/
COPY config.json/ /etc/cwagentconfig
COPY config.json/ /opt/aws/amazon-cloudwatch-agent/etc/amazon-cloudwatch-agent.json
RUN mkdir -p /root/.aws
COPY config/ /root/.aws
copy credentials/ /root/.aws
copy common-config.toml  /opt/aws/amazon-cloudwatch-agent/etc/
RUN chmod +x  /opt/aws/amazon-cloudwatch-agent/bin/start-amazon-cloudwatch-agent
COPY myapp.script.sh /opt/
RUN chmod +x myapp.script.sh
ENTRYPOINT ["/opt/myapp.script.sh"]
Step 3: How to Use AWS CLI To Push Your On-Premises Docker Container Logs To The Cloud
- Config.json – cloudwatch agent config file
The CloudWatch agent configuration file is a JSON file with three sections: agent, metrics, and logs. The agent section includes fields for the overall configuration of the agent. The metrics section specifies the custom metrics for collection and publishing to CloudWatch. Here we create the customise Log group Name, Log file Path, Log stream Name in the below format.
{
    "agent": {
      "region": "eu-north-1",
      "metrics_collection_interval": 10,
      "logfile": "/opt/aws/amazon-cloudwatch-agent/logs/amazon-cloudwatch-agent.log",
      "run_as_user": "root"
    },
    "logs": {
      "logs_collected": {
        "files": {
          "collect_list": [
             {
              "file_path": "/var/log/Application/app.log",
              "log_group_name":  "container-log",
              "log_stream_name": "container-log",
              "timestamp_format": "%d-%b-%Y %H:%M:%S.%f",
              "timezone": "Local"
            }
              ]
        }
      }
    }
  }
Step 4: Create the IAM access for Cloudwatch logging
- Config & Credentials
We have to provide an IAM access key and a secret key to access the cloudwatch.
[default]
region = eu-north-1
output = json
[default]
aws_access_key_id = XXXXXXXXXXXXXX
aws_secret_access_key = XXXXXXXXXXXXXXXXXXXXXXCommon-config.toml
This Common-config.toml file is used when we are sending logs from an on premise Docker container. We need to add the profile name and credential path . We don’t need to add this configuration file from inside the container, when we are using a docker container at AWS Ec2.
his common-config is used to configure items used for both ssm and cloudwatch access
## Configuration for shared credential.
## Default credential strategy will be used if it is absent here:
##      Instance role is used for EC2 case by default.
##      AmazonCloudWatchAgent profile is used for onPremise case by default.
 [credentials]
    shared_credential_profile = "default"
    shared_credential_file = "/root/.aws/credentials"


## Configuration for proxy.
## System-wide environment-variable will be read if it is absent here.
## i.e. HTTP_PROXY/http_proxy; HTTPS_PROXY/https_proxy; NO_PROXY/no_proxy
## Note: system-wide environment-variable is not accessible when using ssm run-command.
## Absent in both here and environment-variable means no proxy will be used.
# [proxy]
#    http_proxy = "{http_url}"
#    https_proxy = "{https_url}"
#    no_proxy = "{domain}"

# [ssl]
#    ca_bundle_path = "{ca_bundle_file_path}"
Myapp.script.sh
We cannot use more than one entrypoint in dockerfile. So we are using a script inside the container to start both services. We should use a single ampersand. It will run both applications in parallel.
#!/bin/bash
cd /opt/aws/amazon-cloudwatch-agent/bin/
./start-amazon-cloudwatch-agent & java -jar /opt/application.jar
exit
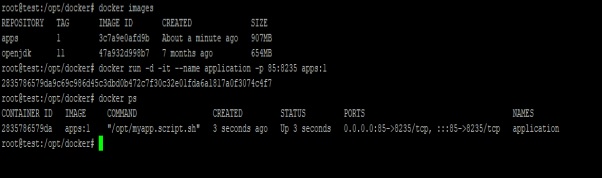
Docker Image Building
We cannot use more than one entrypoint in dockerfile. So we are using a script inside the container to start both services. We should use a single ampersand. It will run both applications in parallel.

Docker Container
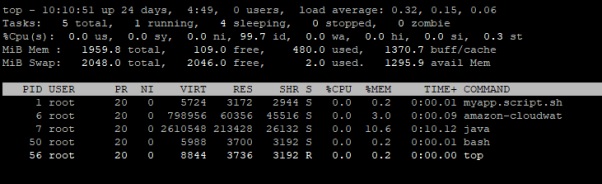
We can verify the cloudwatch agent and spring boot application running by using “top” and “ps -aux “ in inside container

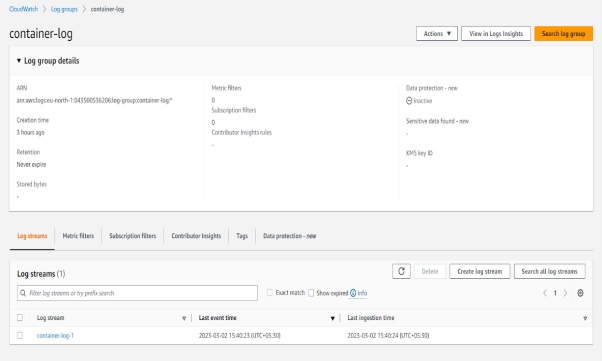
Verify Logs are Being Sent to AWS CloudWatch
Once your container is running, you can verify that the logs are being sent to AWS CloudWatch.
Navigate to the CloudWatch Management Console and select your log group and log stream. You should see your container logs being displayed in real-time. If you do not see any logs, check the logging driver configuration in your Dockerfile to ensure that it is set up correctly.
Conclusion
In conclusion, uploading on-prem Docker container logs to AWS CloudWatch using a Dockerfile is a simple and efficient way to centralize logging for your applications. By following this step-by-step guide, you can easily configure your log stream, logging driver, build and run your Docker container, and verify that your logs are being sent to AWS CloudWatch. With this set up, you can monitor your application logs and gain valuable insights into your application performance, allowing you to quickly identify and resolve issues as they arise.