Introduction
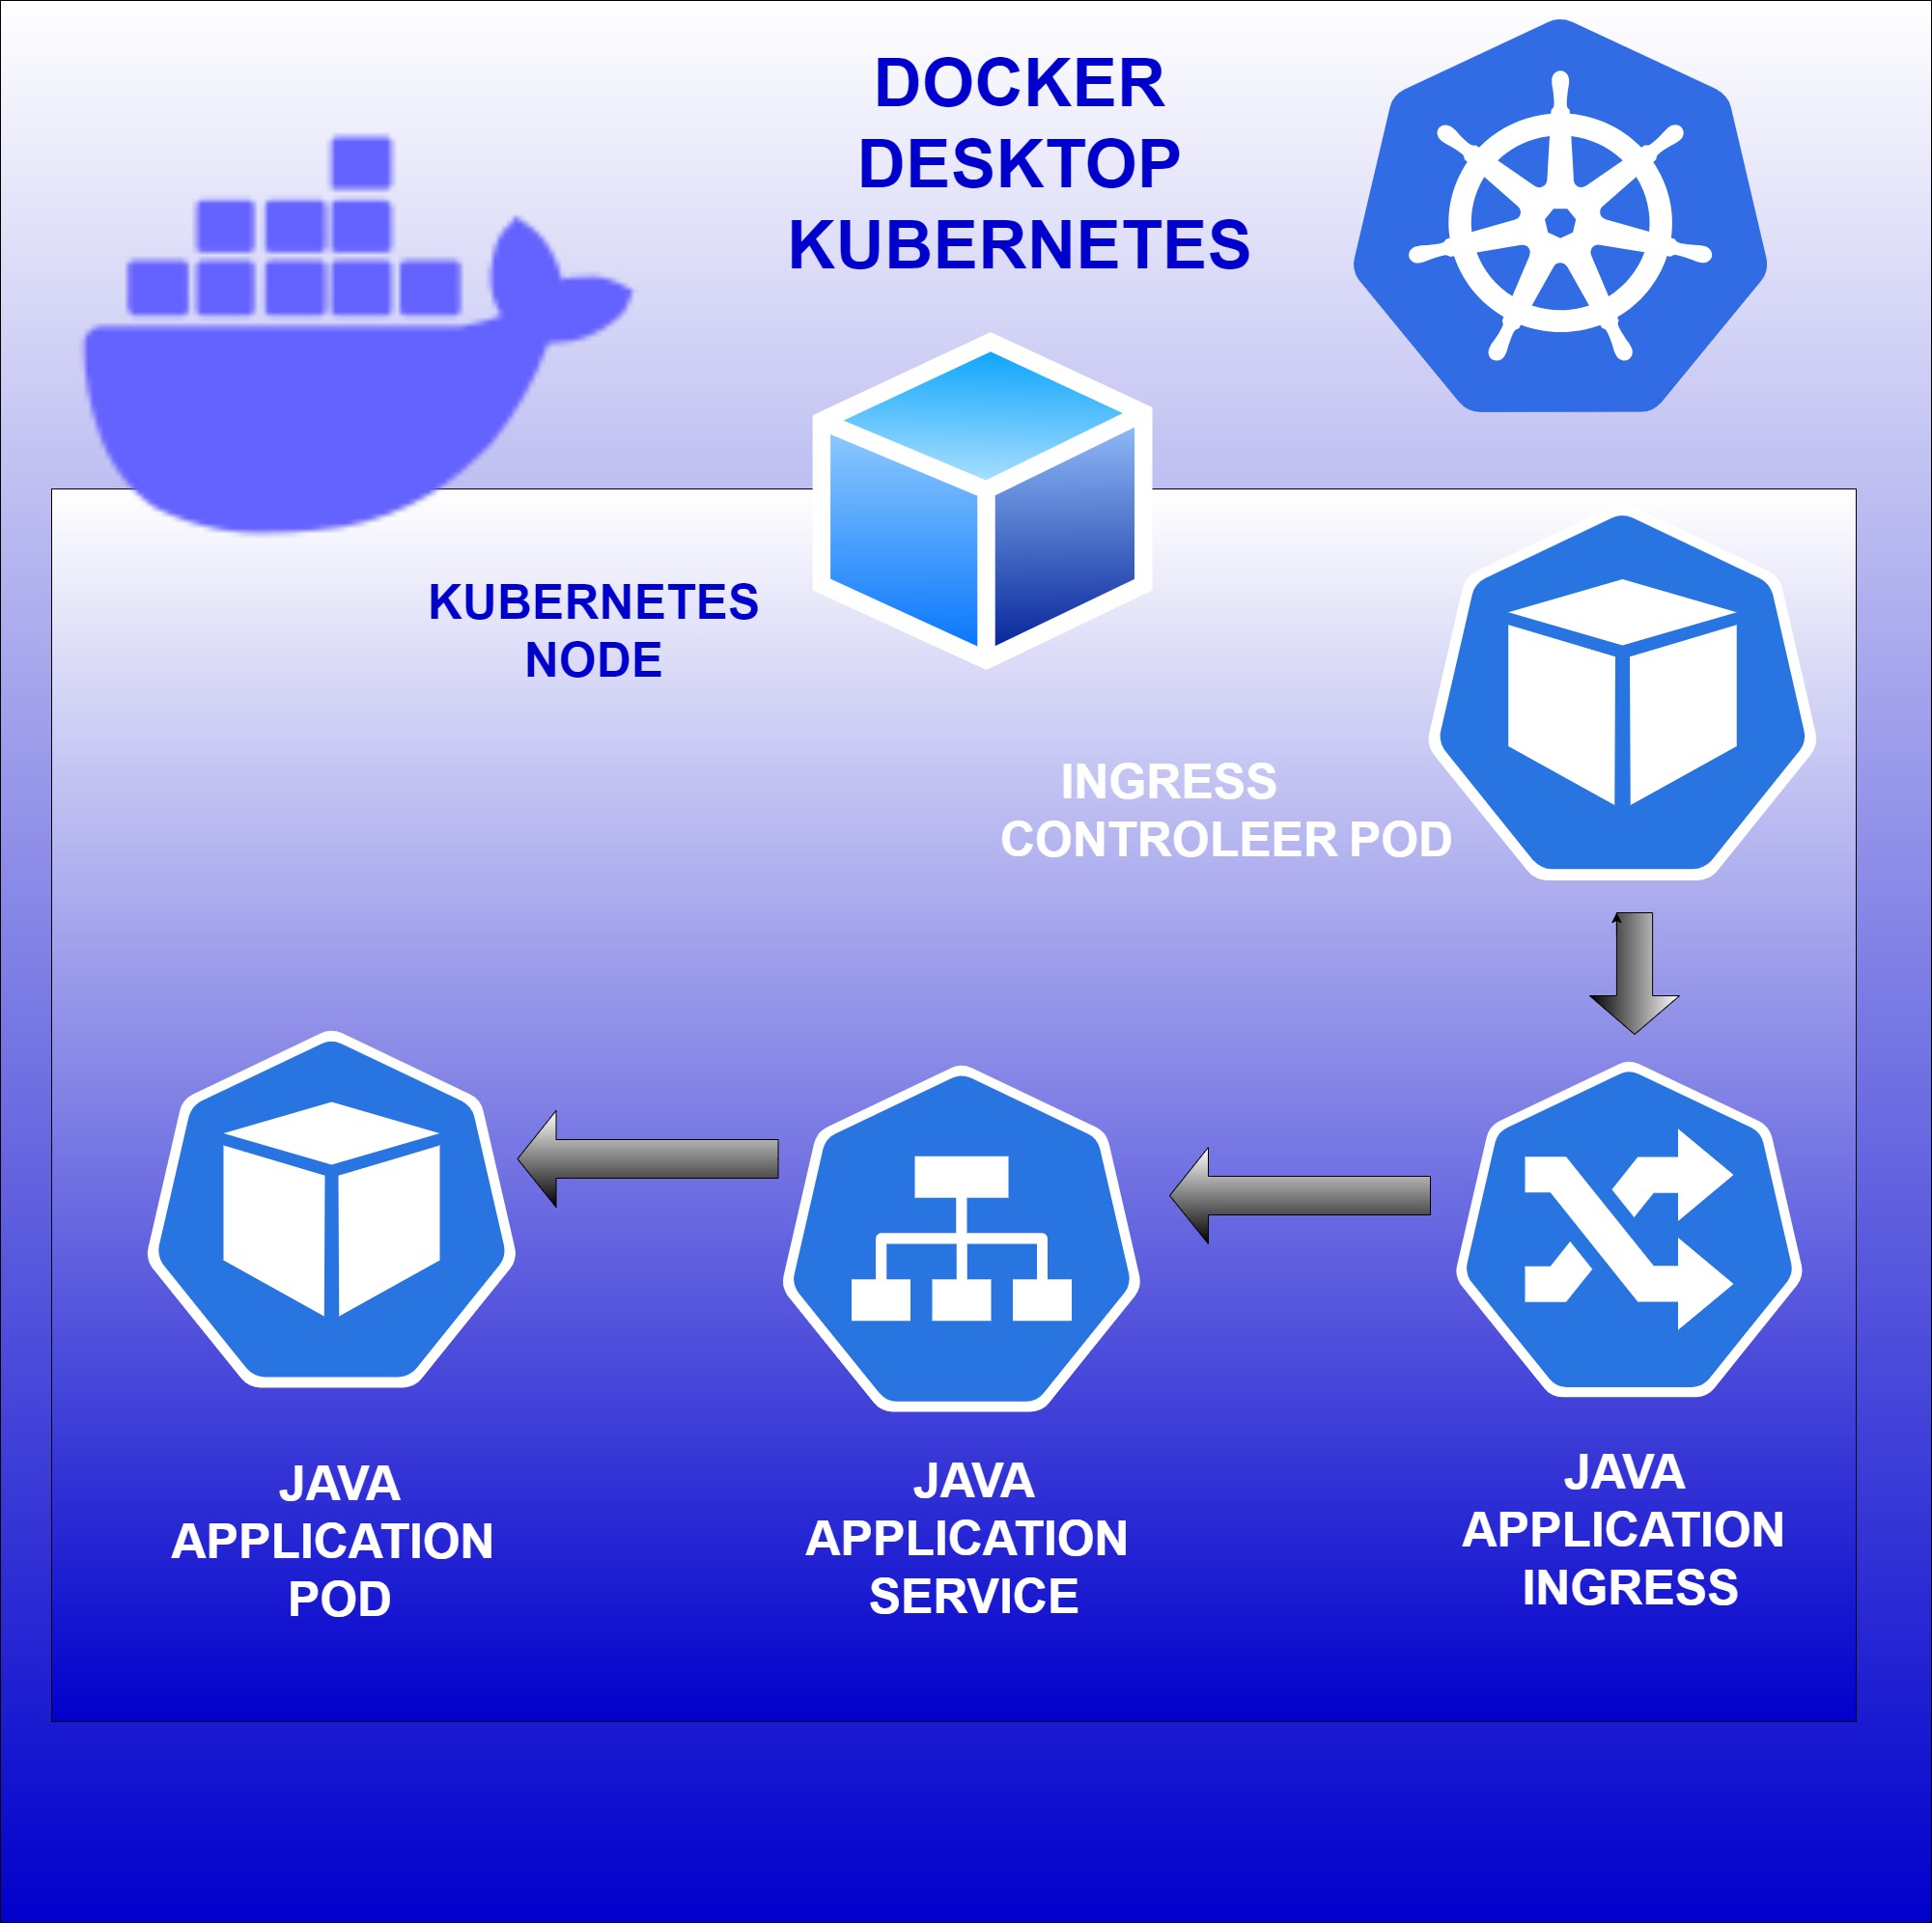
In this guide, we will walk through the process of enabling Kubernetes in Docker Desktop and deploying a Java application on a Kubernetes cluster node by using ingress-nginx
Configuration step
- Installing the Docker Desktop
- Enabling the kubernetes in Docker Desktop
- Building Docker Images
- Deploying the java application in kubernetes cluster
Installing the Docker Desktop
- WSL version 1.1.3.0 or later.
- Windows 11 64-bit: Home or Pro version 21H2 or higher, or Enterprise or Education version 21H2 or higher.
- Windows 10 64-bit: Home or Pro 21H2 (build 19045) or higher, or Enterprise or Education 21H2 (build 19045) or higher.
- Turn on the WSL 2 feature on Windows.
The following hardware prerequisites are necessary for successfully running WSL 2 as a backend on Windows 10 or Windows 11.
64-bit processor , 8GB system RAM, BIOS-level hardware virtualization support must be turned on in the BIOS settings
Download Docker Desktop by following the link, then install it and reboot your system.
https://docs.docker.com/desktop/install/windows-install/

After licensing, if you encounter a “Docker Desktop required a newer WSL kernel version” error, you can resolve it by updating the kernel using the “wsl-update” command.

At the end, we have installed and started Docker Desktop. You can verify the Docker engine and client’s running status by using the “docker –version” command.
Enabling the kubernetes in Desktop docker
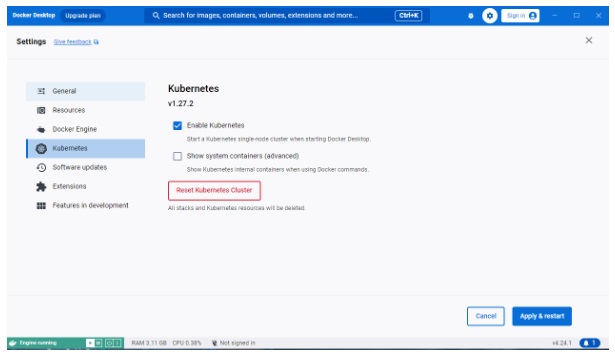
- In Docker Dashboard, select the Settings and then Kubernetes from the left sidebar.
- Click the checkbox on Enable kubernetes and apply & restart, save the setting.
Note:
- Kubernetes containers will be hidden within Docker Desktop containers, and they won’t appear in commands like “docker ps.” To view the Docker Kubernetes containers, navigate to Settings -> Kubernetes, check the “Show system containers (advanced)” checkbox, and then click apply & restart.

- You can verify the status of the local Kubernetes cluster nodes by using the command “kubectl get node.”

Building Docker Images
Here is a sample Dockerfile for a java application to build a Docker image.
Dockerfile
FROM openjdk:17-jdk-slim
COPY app.jar app.jar
EXPOSE 8080 5701
ENTRYPOINT java -jar app.jar
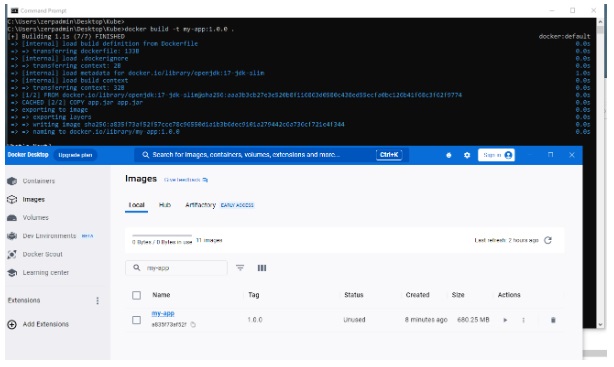
docker build -t my-app:1.0.0.
Deploying java application in kubernetes cluster
Now, let’s see how to deploy an application within a new namespace in a local Kubernetes environment.
Installing ingress-nginx
Ingress-Nginx is a popular Kubernetes Ingress controller that facilitates the management of external access to services within a Kubernetes cluster. It plays a crucial role in routing and controlling incoming traffic to various applications and services, offering essential features such as load balancing, routing, security, and more.

Namespace creation
Deployment Creation
Name:deployment.yaml
apiVersion: apps/v1
kind: Deployment
metadata:
  name: app-deployment
  namespace: development
spec:
  replicas: 2
  selector:
    matchLabels:
      app: app-lab
      version: "1"
  template:
    metadata:
      labels:
        app: app-lab
        version: "1"
    spec:
      containers:
        - name: app-deployment
          image: my-app:1.0.0
          imagePullPolicy: IfNotPresent
          env:
            - name: APP_VERSION
              value: "6"
          ports:
            - name: http
              containerPort: 8080
            - containerPort: 5701
              protocol: TCP
              name: multicast
image: my-app:1.0.0 – using locally built image.
imagePullPolicy: IfNotPresent – to pull image from local docker image repository.
Kubectl apply -f deployment.yaml
Created the containers, pods, replicaSets in the background.
Services — Access the deployment
- Name: Service.yaml
kind: Service
apiVersion: v1
metadata:
  name: app-svc
  namespace: development
spec:
  selector:
    app: app-lab
    version: "1"
  ports:
    - name: http
      port: 80
      targetPort: http
---
apiVersion: v1
kind: Service
metadata:
  name: hazelcast-service
  namespace: development
spec:
  selector:
    app: app-lab
    version: "1"
  ports:
    - name: multicast
      port: 5701
  type: ClusterIP
kubectl apply -f service.yaml
Both “App-svc” and “hazelcast-service” service connect to all the pod of “app-deployment” deployment .
Nginx ingress – Routing the traffic to service
Name:ingress.yaml
apiVersion: networking.k8s.io/v1
kind: Ingress
metadata:
  name: app-nginx
  namespace: development
  annotations:
    kubernetes.io/ingress.class: "nginx"
    # --- Optional ---
    # If server Push is enabled in the application and uses Websocket for transport,
    # these settings replace the default Websocket connection timeouts in Ngnix.
    nginx.ingress.kubernetes.io/proxy-send-timeout: "86400"
    nginx.ingress.kubernetes.io/proxy-read-timeout: "86400"
    # ---
    nginx.ingress.kubernetes.io/affinity: "cookie"
    nginx.ingress.kubernetes.io/affinity-mode: "persistent"
spec:
  rules:
    - http:
        paths:
          - path: /
            pathType: Prefix
            backend:
              service:
                name: app-svc
                port:
                  number: 80
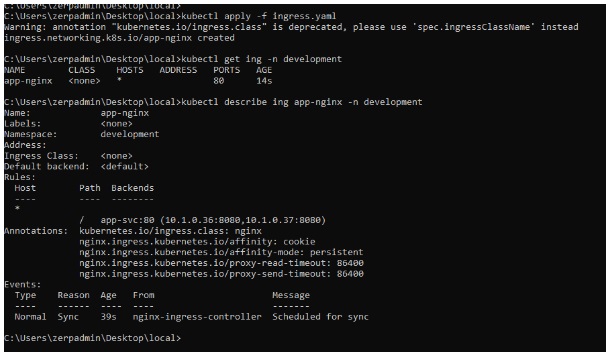
Kubectl apply -f ingress.yaml
When you access “http://localhost,” Nginx Ingress will route the traffic to your service “app-svc,” and “app-svc” will then direct it to one of the pods in the “app-deployment” deployment.
Conclusion:
By using Docker desktop , Developers can easily set up a Kubernetes local environment, deploy their applications within Kubernetes, and test them as if they were in a production environment.

