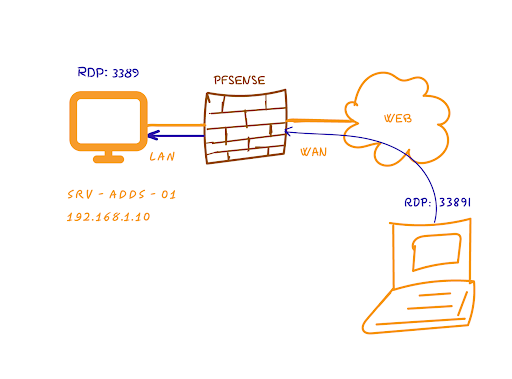
Introduction
In today’s interconnected world, port forwarding plays a crucial role in facilitating network communication. Whether you need to host a web server, set up remote access, or run online gaming servers, port forwarding allows you to direct incoming traffic to specific devices or services on your network. PFsense, a popular open-source firewall and routing solution, provides powerful features for configuring port forwarding. In this comprehensive guide, we will walk you through the process of setting up port forwarding in PFsense, enabling you to unlock the full potential of your network.
Section 1:
Understanding Port Forwarding To begin our journey, let’s first understand what port forwarding is and why it is important. Port forwarding allows you to redirect incoming connections from a specific port on your router to a specific device or service on your local network. It enables remote devices to access services hosted on your network by forwarding the necessary network traffic. Another benefit of using port forwarding is that it allows you to avoid using a VPN in some instances.
Section 2:
Why Use PFsense for Port Forwarding? Now that we grasp the concept of port forwarding, let’s explore why PFsense is an excellent choice for configuring it. PFsense is a powerful open-source firewall and routing solution that provides advanced features and robust security. With PFsense, you not only get a user-friendly web-based interface for configuring port forwarding but also benefit from additional security measures such as stateful packet inspection.
Step 1: Logging into PFsense Firewall and Accessing NAT Settings
- Log in to your PFsense firewall.
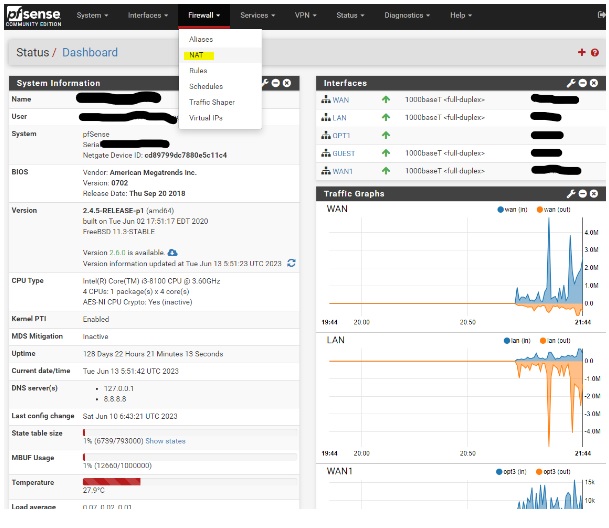
- Navigate to the firewall menu and select NAT.
Step 2: Adding a Port Forwarding Rule
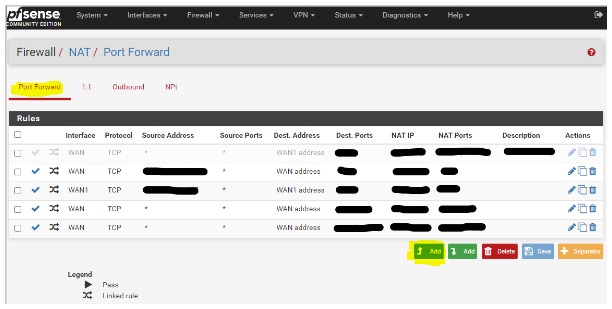
- Click on the Port Forward tab.
- Click the Add button.
Step 3: Creating a New Port Forwarding Rule
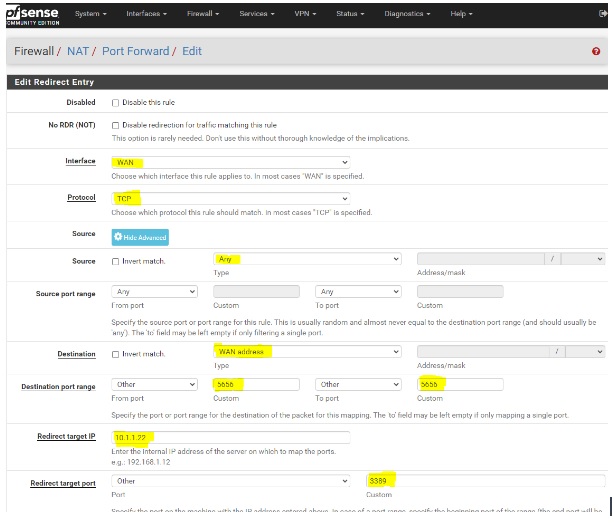
- Interface & Protocol: Select the interface connected to the internet (WAN) and choose the protocol as TCP (RDP currently supports TCP protocol only).
- Source: Provide the network or single host/alias. If you have a static IP, this NAT rule will only work for that specific network. In this example, we will set up the source as “any”.
- Destination Port Range: Specify the custom port number that will be used to access the outside network.
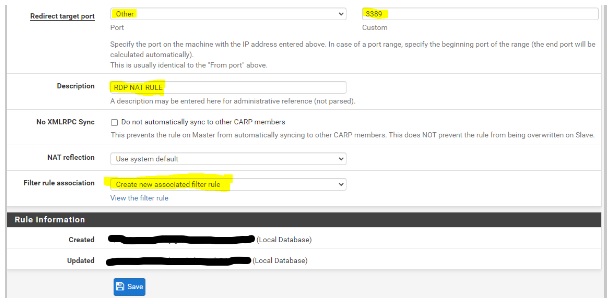
- Redirect target IP and Redirect target port: Enter the internal IP address and port number of the device or service you want to forward the traffic to.
- Description: Optional. You can provide a description, such as “RDP NAT Rule”.
- Filter rule association: Choose “create new associated rule” to automatically create a firewall rule in the WAN interface. This eliminates the need to manually create firewall rules for this port forwarding. Click “Save” to proceed.

Step 4: Verifying the Port Forwarding Rule
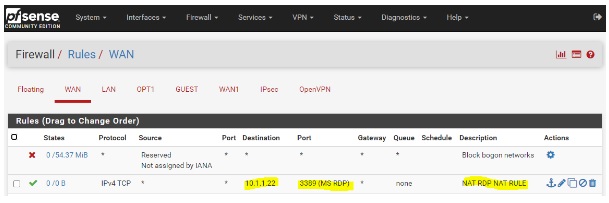
- Go to Firewall → Rules → WAN. You will see the created firewall rule for port forwarding.
Step 5:
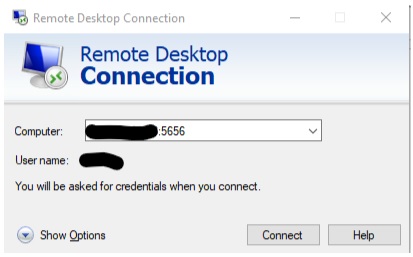
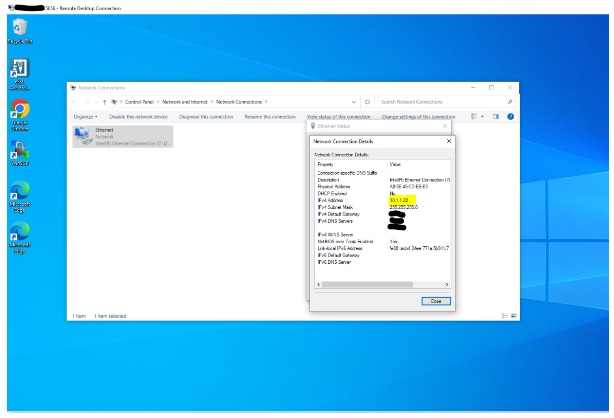
Testing Port Forwarding Once you have set up port forwarding in PFsense, it’s essential to verify that it’s working correctly. At this time, connect to the RDP through your static IP. You should be able to see the internal IP in the RDP machine.
Conclusion:
This ensures that your network remains protected from unauthorized access while allowing you to take full control of your port forwarding requirements.
If you have any queries on this topic please click on the below link to avail free consultation service.

