Cloud Technologist | Architecting Innovative Solutions for Digital Transformation | AWS, Azure, GCP Expert | Passionate about Emerging Technologies

Introduction
Ansible simplifies complex tasks by providing a declarative language to describe desired states and configurations, rather than writing procedural code.
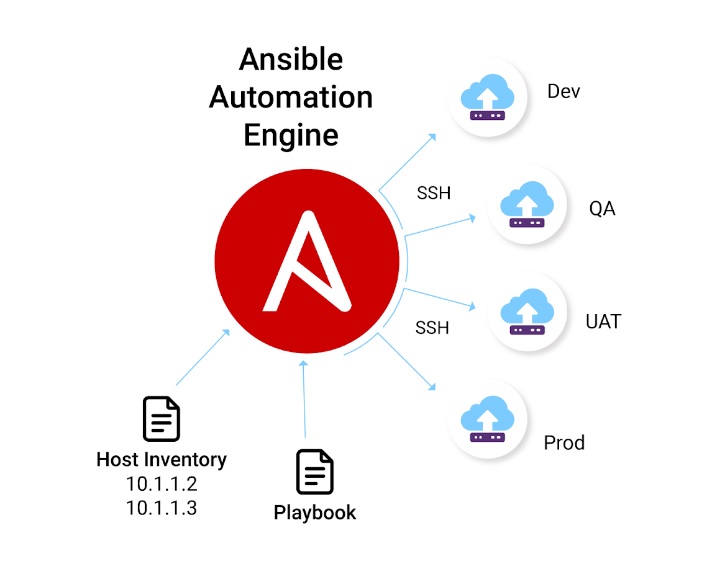
With Ansible, we can manage a large number of servers, network devices, and other infrastructure components from a central location.
It uses SSH (Secure Shell) or WinRM (Windows Remote Management) to establish connections with remote systems, enabling you to execute tasks across multiple machines simultaneously.
Key features of Ansible include:
- Agentless: Ansible operates in a “pull” mode, meaning it does not require any software or agents to be installed on the managed nodes. This simplifies deployment and reduces maintenance overhead.
- Playbooks: Ansible uses YAML-based playbooks to define automation workflows. Playbooks describe the desired state of the system and consist of tasks, modules, variables, and conditionals.
- Idempotent: Ansible ensures idempotency, meaning that if the desired state of a system is already achieved, running the same playbook multiple times will not cause any unintended changes.
- Modules: Ansible provides a broad range of pre-built modules that handle specific tasks, such as managing packages, configuring services, manipulating files, or interacting with cloud providers. These modules can be combined to create custom automation workflows.
- Roles: Ansible allows you to organize your playbooks and tasks into reusable units called roles. Roles provide a structured way to share and reuse automation code across projects.
- Extensibility: Ansible can be extended and customized using plugins and custom modules written in various programming languages, including Python.
Setting the Ansible server and integrating remote servers
Step 1: Installation
- Ensure you have a machine running a compatible operating system (Linux, macOS, or Windows).
- Install Ansible using one of the following methods:
- On Linux: Use your distribution’s package manager (e.g., apt, yum, dnf) to install Ansible.
- On macOS: Install Ansible using Homebrew by running
brew install ansiblein the Terminal. - On Windows: Use Windows Subsystem for Linux (WSL) or Cygwin to install and run Ansible.
Step 2: Set up an inventory file in Ansible Server
- Create an inventory file that lists the details of your remote servers. The inventory file is usually named hosts and resides in the
/etc/ansible/directory on Linux or macOS. - Add the IP addresses or domain names of your servers in the inventory file along with any specific configuration details. For example:
[servers]
server1 ansible_host=192.168.1.100 ansible_user=username ansible_password=password
server2 ansible_host=192.168.1.101 ansible_user=username
ansible_ssh_private_key_file=/path/to/private_key.pem
Note: We dont need to install any agent in remote servers.

Step 3: Test connectivity
- Run a simple ping command to test connectivity to your servers:
Step 3: Test connectivity

Run a simple ping command to test connectivity to your servers:
Step 3: Test connectivity
- Run a simple ping command to test connectivity to your servers:
ansible -i /etc/ansible/hosts servers -m pingStep 4: Write Ansible playbooks
- Create playbooks that define the tasks you want to perform on the remote servers. Playbooks are written in YAML format and typically have a
.ymlor.yamlextension. - Define tasks, variables, and configurations in your playbook to perform actions on the remote servers. Refer to Ansible’s documentation for detailed guidance on writing playbooks.
Step 5: Run Ansible playbooks
- Execute your Ansible playbooks using the
ansible-playbookcommand:
ansible-playbook -i /etc/ansible/hosts playbook.ymlReplace/etc/ansible/hostswith the path to your inventory file andplaybook.ymlwith the name of your playbook.
These steps should help you get started with installing Ansible and integrating it with remote servers. Make sure to refer to the Ansible documentation for more advanced usage and configuration options.
